ADFS Integration
This guide will help you configure Active Directory Federation Services (ADFS) for integration with CLICK.
This guide was written for Windows Server 2016. Steps and appearance may vary slightly in other versions of Windows Server.
Open the ADFS Management Console
You can perform these steps directly on your ADFS server, or any server in your domain that has the ADFS Management Tools installed.
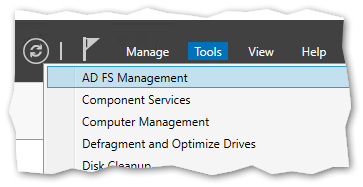
Open Server Manager and navigate to Tools > AD FS Management in the upper left-hand side of the window to open the management console.
Create a Relying Party Trust
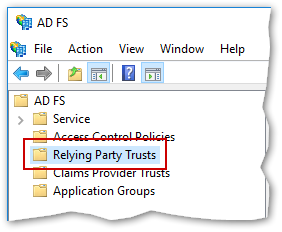
Navigate to the Relying Party Trusts section of the AD FS Management console in the tree on the left-hand side of the window.
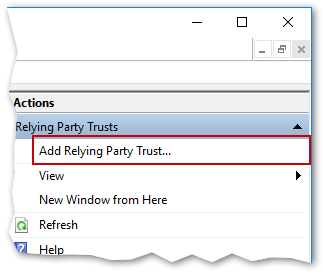
In the Actions pane on the right-hand side, click Add Relying Party Trust...
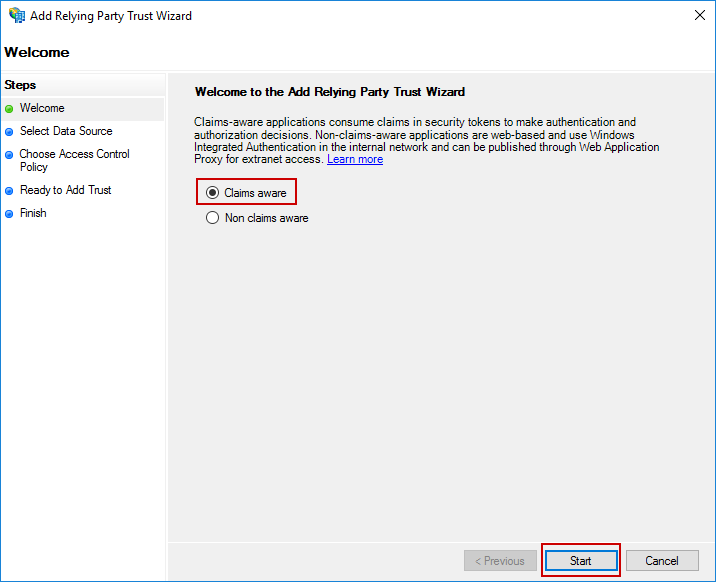
The Add Relying Party Trust Wizard will appear. Select Claims aware and click Start.
On the next screen, select Enter data about the relying party manually, and click Next.
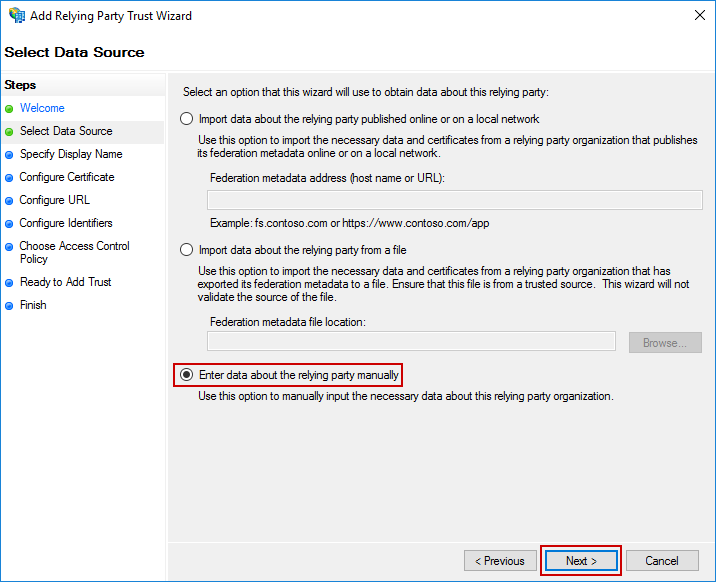
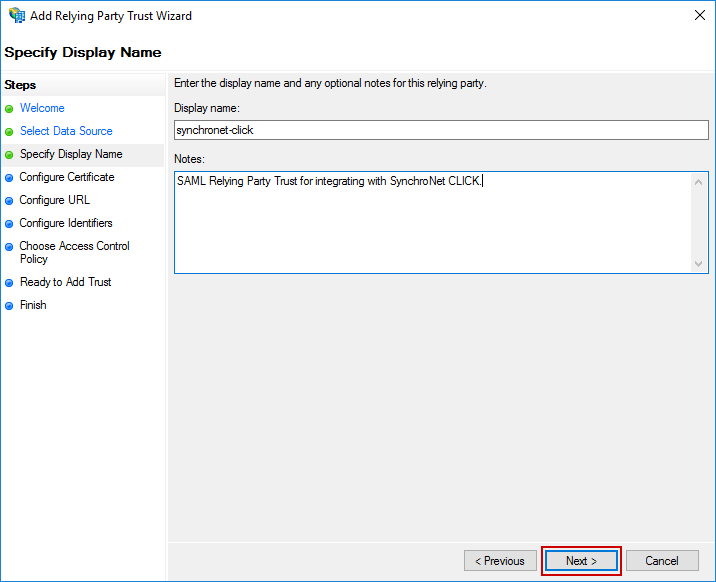
Enter a Display name value that will be meaningful to you, and add notes if you would like. Then, click Next.
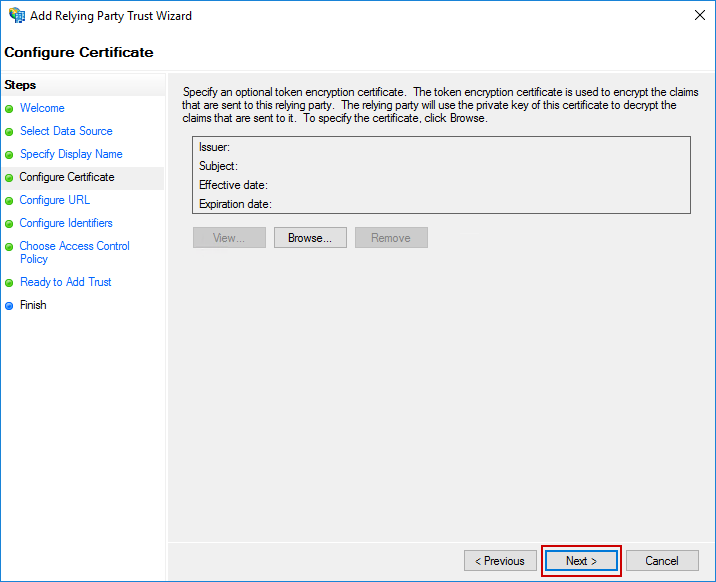
On the Configure Certificate screen that appears next, do not select a Certificate. Simply click Next.
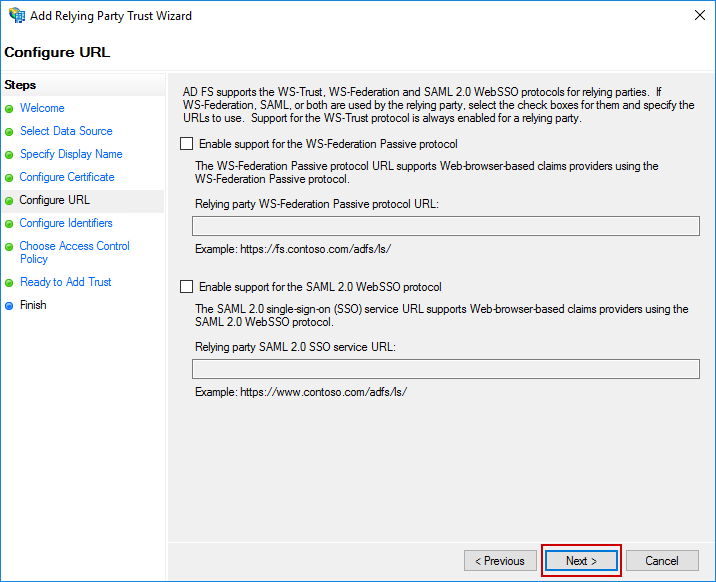
The Configure URL screen will appear. Leave both options unchecked and click Next.
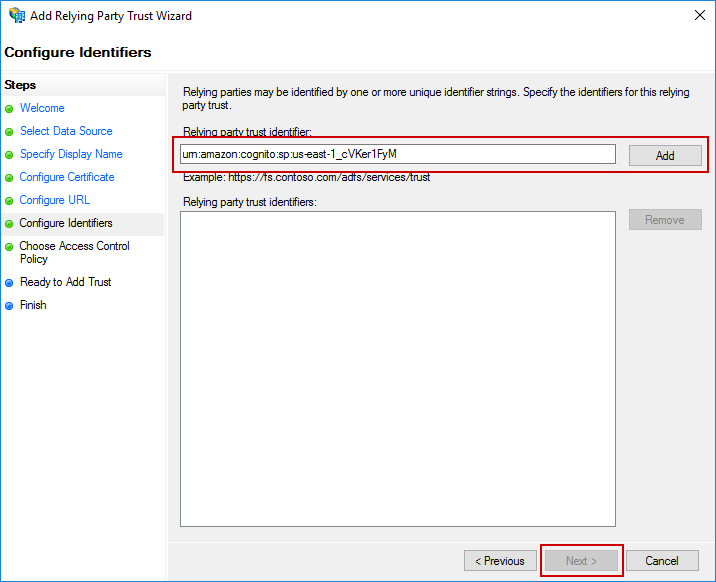
Next, the Configure Identifiers screen will be displayed. Enter the following value in the Relying party trust identifier field and click Add.
urn:amazon:cognito:sp:us-east-1_cVKer1FyM
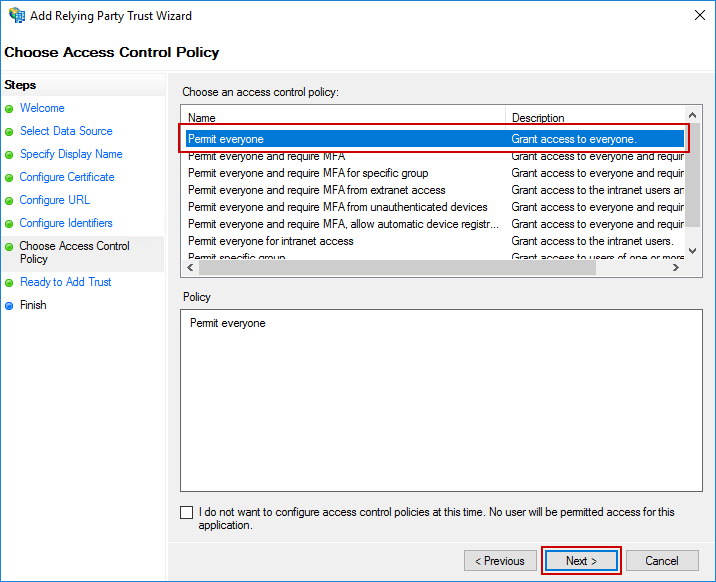
On the next screen, select Permit everyone and click Next.
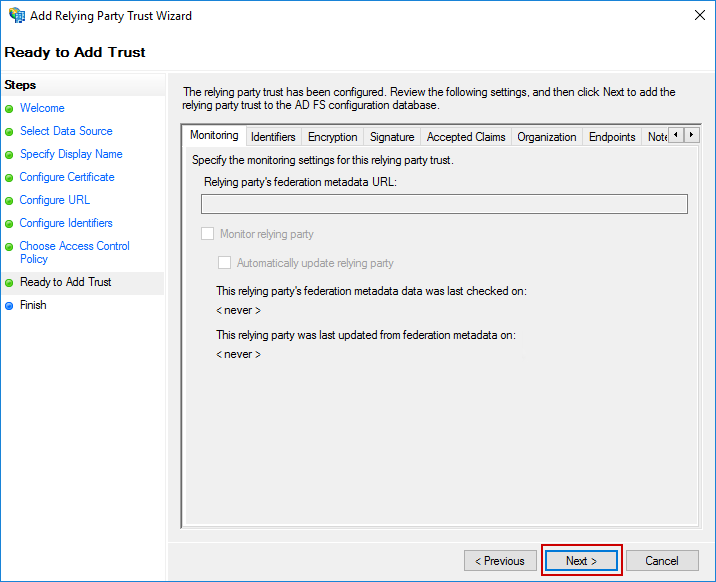
You do not need to change anything on the Ready to Add Trust screen. Click Next.
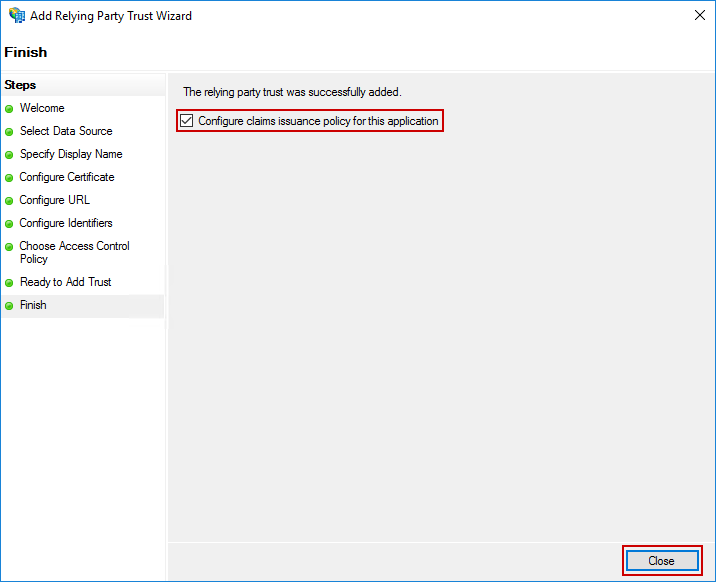
On the final screen, ensure the Configure claims issuance policy for this application checkbox is checked, and click Close.
Create Claim Issuance Transform Rules
After the end of the previous steps, Edit Claims Issuance Policy screen should appear. If it does not, you can open it by right-clicking on the Relying Party Trust and selecting Edit Claim Issuance Policy....
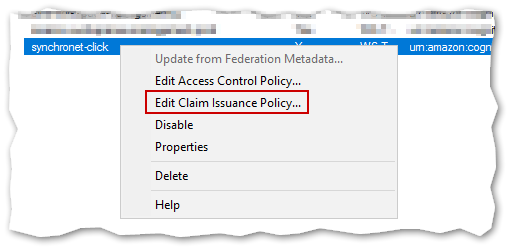
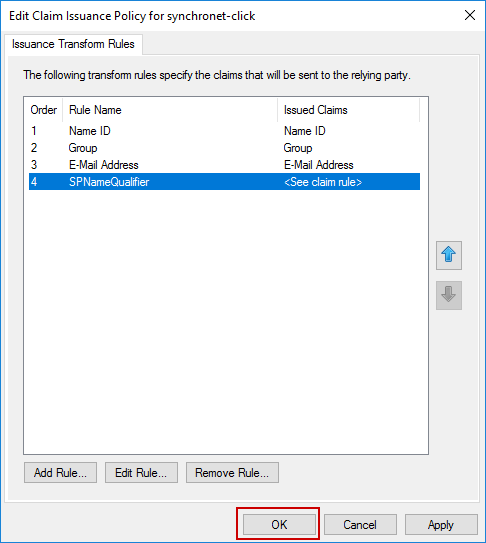
You will need to create four Issuance Transform Rules.
Click on Add Rule to create a new rule.
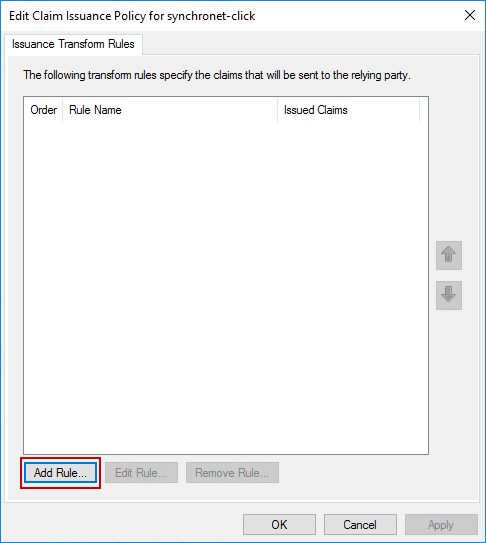
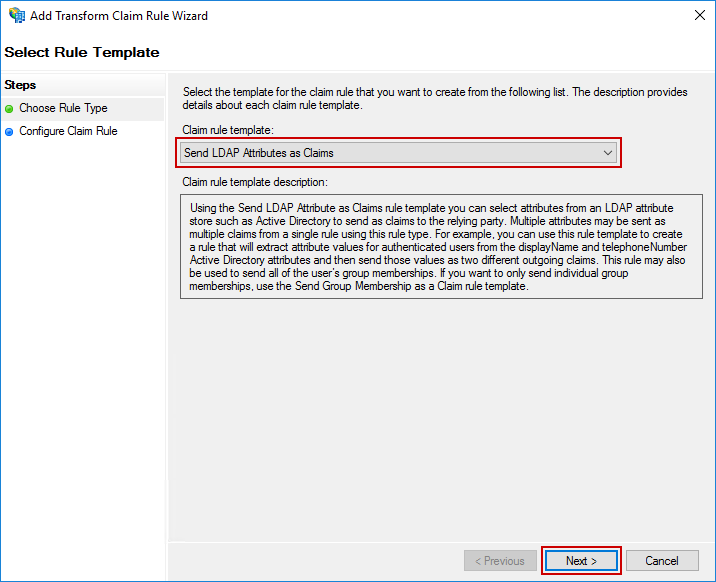
On the dialog that appears, select Send LDAP Attributes as Claims for the Claim rule template, and click Next.
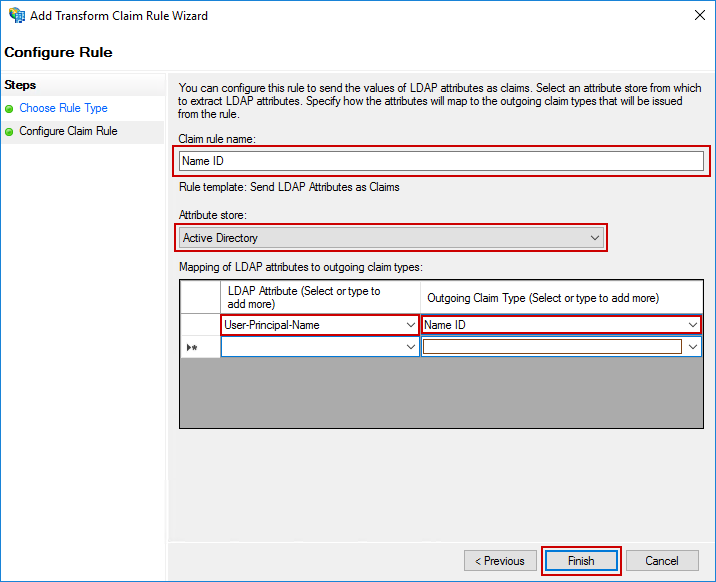
Fill in the following values on the next screen:
- Claim rule name:
Name ID - Attribute store:
Active Directory - LDAP Attribute:
User-Principal-Name - Outgoing Claim Type:
Name ID
Be Careful
There is also an Outgoing Claim Type of
Name, but that is not the one you need. Be sure to selectName ID.
Click Finish to create the rule.
Following the same process as above, create a second rule using these values:
- Claim rule template:
Send LDAP Attributes as Claims - Claim rule name:
Group - Attribute store:
Active Directory - LDAP Attribute:
Token-Groups as SIDs - Outgoing Claim Type:
Group
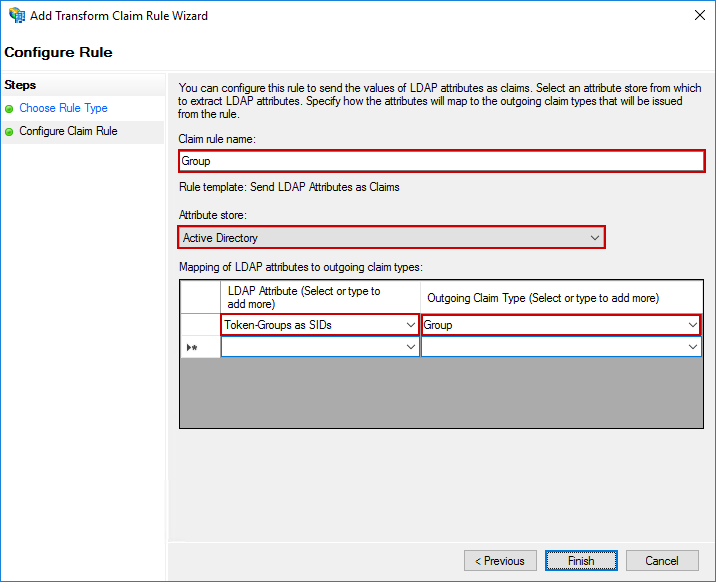
Add a third rule using these values:
- Claim rule template:
Send LDAP Attributes as Claims - Claim rule name:
E-Mail Address - Attribute store:
Active Directory - LDAP Attribute:
User-Principal-Name - Outgoing Claim Type:
E-Mail Address
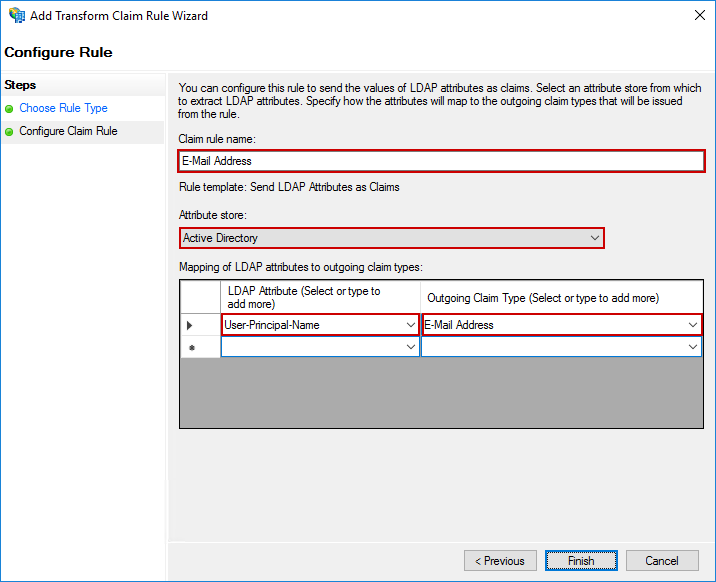
The last rule is slightly different than the others. For the Claim rule template, select Send Claims Using a Custom Rule and click Next.
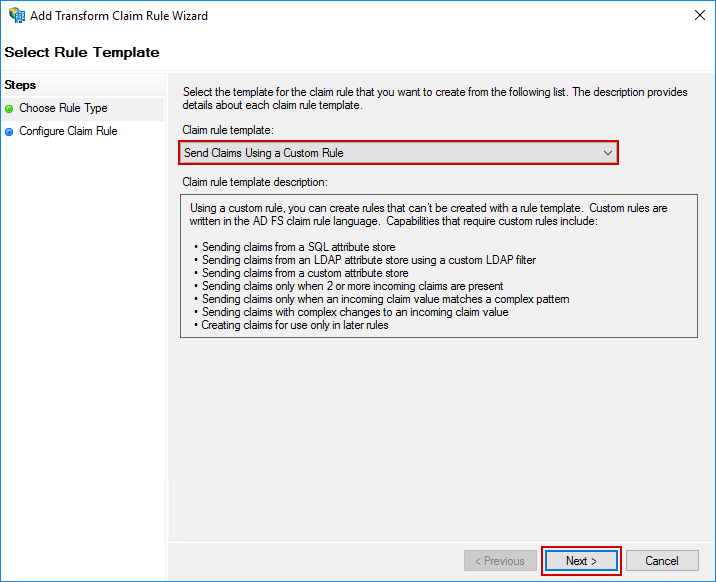
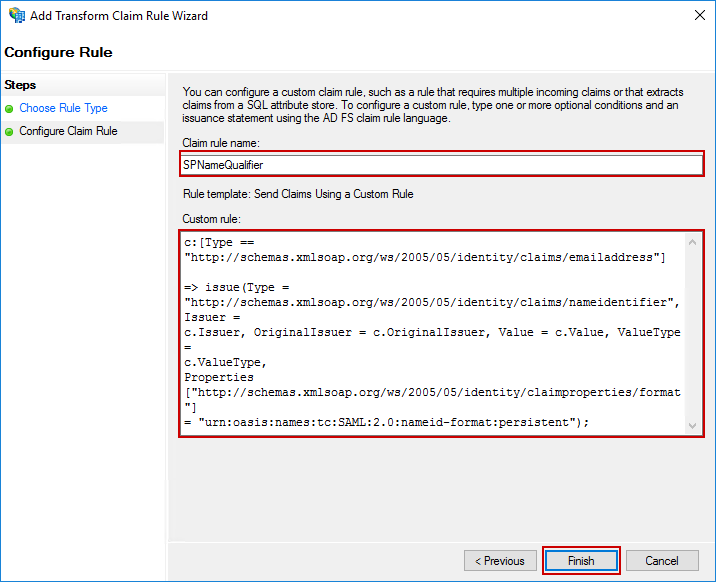
For the Claim rule name, type SPNameQualifier. For the Custom rule, copy and paste the below rule definition.
c:[Type == "http://schemas.xmlsoap.org/ws/2005/05/identity/claims/emailaddress"]

=> issue(Type =
"http://schemas.xmlsoap.org/ws/2005/05/identity/claims/nameidentifier", Issuer =
c.Issuer, OriginalIssuer = c.OriginalIssuer, Value = c.Value, ValueType =
c.ValueType,
Properties["http://schemas.xmlsoap.org/ws/2005/05/identity/claimproperties/format"]
= "urn:oasis:names:tc:SAML:2.0:nameid-format:persistent");
Click Finish to create the rule.
When you are done, the dialog should look like the screenshot below. Click OK to close it.
Create Endpoints
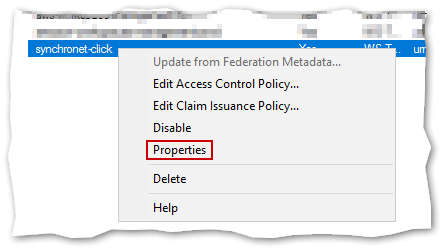
Bring up the Properties dialog by right-clicking your Relying Party Trust and selecting Properties.
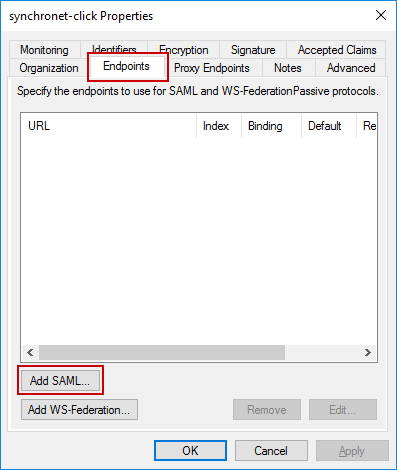
You will need to add two endpoints. Switch to the Endpoints tab and click Add SAML.
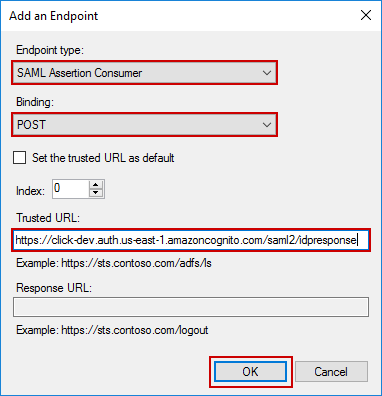
On the dialog that appears, enter the following values:
- Endpoint type:
SAML Assertion Consumer - Binding:
POST - Trusted URL:
https://auth.click.synchronet.com/saml2/idpresponse
Click OK to create the endpoint.
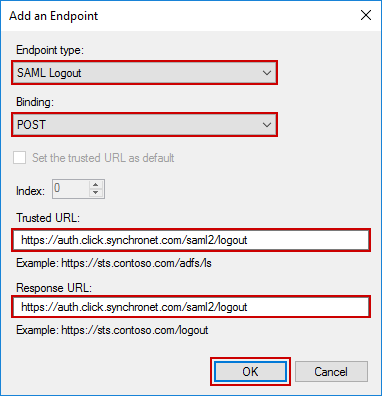
Click Add SAML again to create the second rule. Enter the following values:
- Endpoint type:
SAML Logout - Binding:
POST - Trusted URL:
https://auth.click.synchronet.com/saml2/logout - Response URL:
https://auth.click.synchronet.com/saml2/logout
Once again, click OK to create the rule.
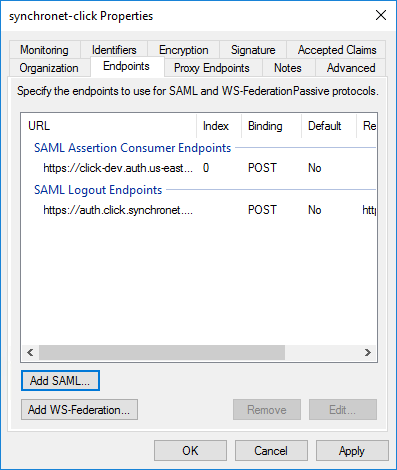
The completed endpoints display should look like the below screenshot.
Add Signing Certificate
You will need the certificate public key for CLICK's SAML Provider. You can download the file here, but if the server you are working on does not have Internet connectivity, paste the following into Notepad and save it with a .cer extension.
-----BEGIN CERTIFICATE-----
MIICvTCCAaWgAwIBAgIJAO4bhvfU4An6MA0GCSqGSIb3DQEBCwUAMB4xHDAaBgNVBAMME3VzLWVhc3QtMV9jVktlcjFGeU0wHhcNMTkwOTExMTkxOTU4WhcNMjkwOTExMTkxOTU4WjAeMRwwGgYDVQQDDBN1cy1lYXN0LTFfY1ZLZXIxRnlNMIIBIjANBgkqhkiG9w0BAQEFAAOCAQ8AMIIBCgKCAQEAjM422xFjYRHO33K8K0ovY9sdy4urGFMV0IrvCNk5C98vOn5nOHpzl87zSbn00OsKWdSERfoa9rq9vJMyWWEQnSO96B6goLrGncHh8YZfuZCvJpFiAwADcUO1JnsHJ3xHVoFjhSlrTW6KXPg+xAnQSMP1HE6Zm7oMeCdq4hIuyNFLHdRnxOPQqIx/suv+VXBhl1lwvBLHv01rm/m21gPGDOi8llC1V4UlRNJHdlpiDSqFy1WFm6rAK/knMZRH0nKpcMSxWbgFLdCaCfIx85wjFkqt7epxSVRU+F0XLYjATIxdPkc0BrJI8a5eazFErVy35NshRji8zbwRLoQz+2f9ZwIDAQABMA0GCSqGSIb3DQEBCwUAA4IBAQBqpOboK4W3TgY7mBj9A9gfzrYtweGJwzwH/d6E48aCNU6KMvDjOSaYHvX46rwOHjswU9+S4ppjG7Cprp5GHFXHrOS5oxB3oYMMJQjrJMHyTKzCJeSfDksacUBpdC+Ttex0r1f1v9KtepfBwZVlCwk39aE59vV7DU39o5cYCA830At3h9tG450KW7zYIURjWfKxYwMtbWBZSfkdxgfYZ5CI0gjTXsZ/BL8yQn7wtszXpwWQDpbbNMFvrpHTR8ihqqkHnvIc35C4XBXHKzd5YK4FH4f4TgPnq2Z/ZmwgxLdIV5UmTlTGv/7JwNVCrwYOPUqxCgG2L5je/qUouA36k+Qk
-----END CERTIFICATE-----
Take note of the path where you store this file.
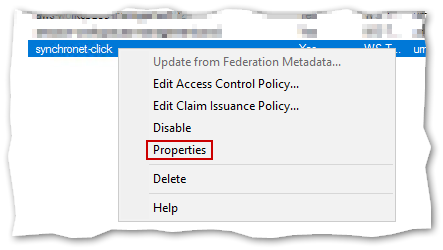
Bring up the Properties dialog by right-clicking your Relying Party Trust and selecting Properties.
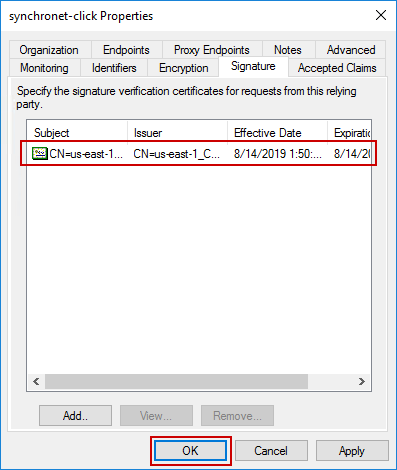
Switch to the Signature tab and click Add
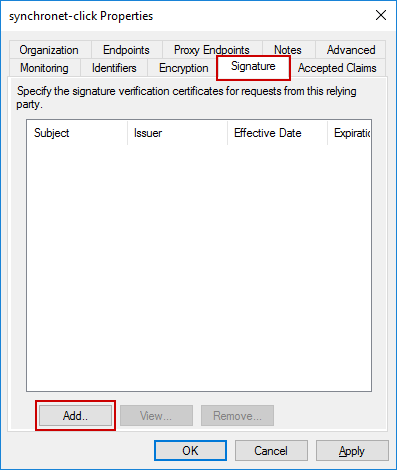
Browse to the path where you stored the certificate file and select it in the file selection dialog. Confirm that the certificate information is displayed and click OK.
Configuration Complete
You have successfully configured ADFS to integrate with CLICK. If you are performing a CLICK deployment, you will need to capture two pieces of information in the Deployment Readiness Checklist before you continue.
2.1 - Metadata Document URL
In Item 2.1 of the checklist document, you will need to fill in the URL to your ADFS Metadata Document XML. For ADFS, the standard URL is:
https://__server__/federationmetadata/2007-06/federationmetadata.xml
For your specific environment, you must replace __server__ with the public-facing DNS name of your ADFS or ADFS Proxy server.
2.2 - Identifiers
The SAML Identifiers value should simply be the suffix you use on User Principal Names in your domain. For example, given a domain with User Principal Names like [email protected] and [email protected], the value you should place in Item 2.2 of the checklist document is company.net.
Updated about 5 years ago
