Step 5b: Deploy AD Gateway
AD Gateway
If you are applying a subscription to an existing Instance, you will not be required to complete this step.
If you created a new CLICK instance, you will need to deploy the CLICK AD Gateway into your AWS Account. We provide a CloudFormation Template to simplify this process as much as possible, but the fact remains that Active Directory environments can be fairly complex. After ensuring you have gathered all necessary data on the Deployment Readiness Checklist, follow these steps for a successful AD Gateway deployment.

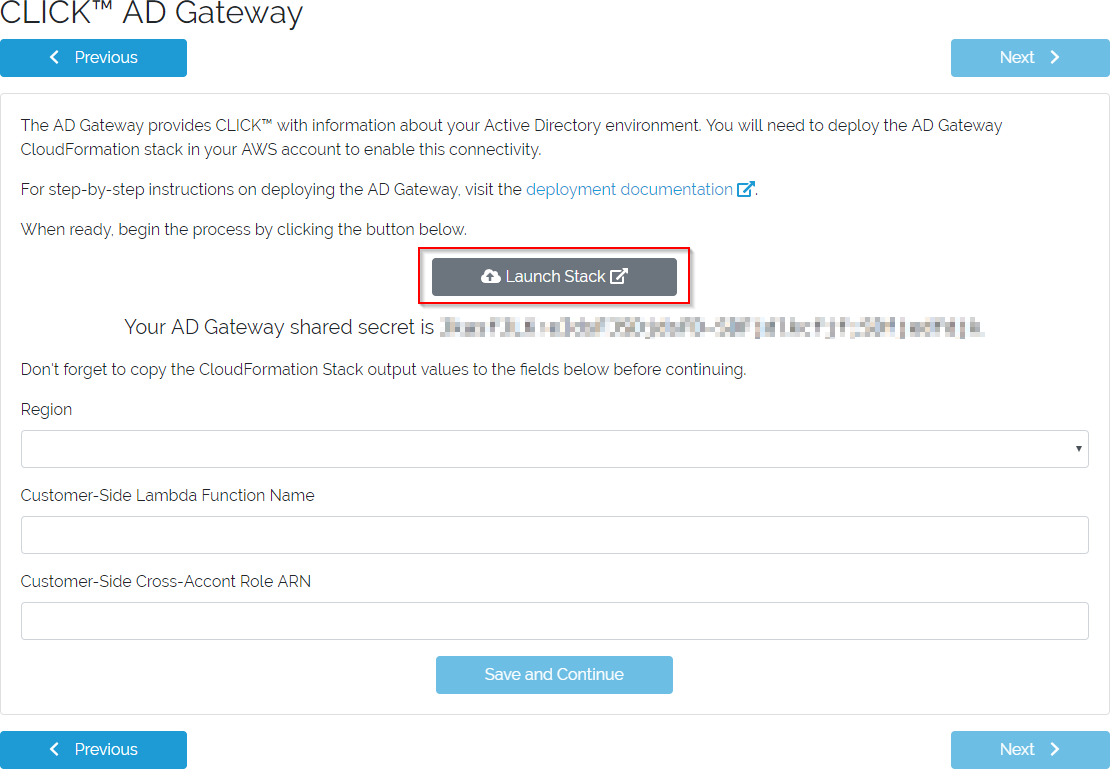
AD Gateway form
- Start at the AD Gateway form pictured above.
- In a separate browser tab, ensure you are logged in to the AWS Account where you intend to deploy the AD Gateway (including selecting the desired region), using administrative credentials.
- Return to the AD Gateway form and click the
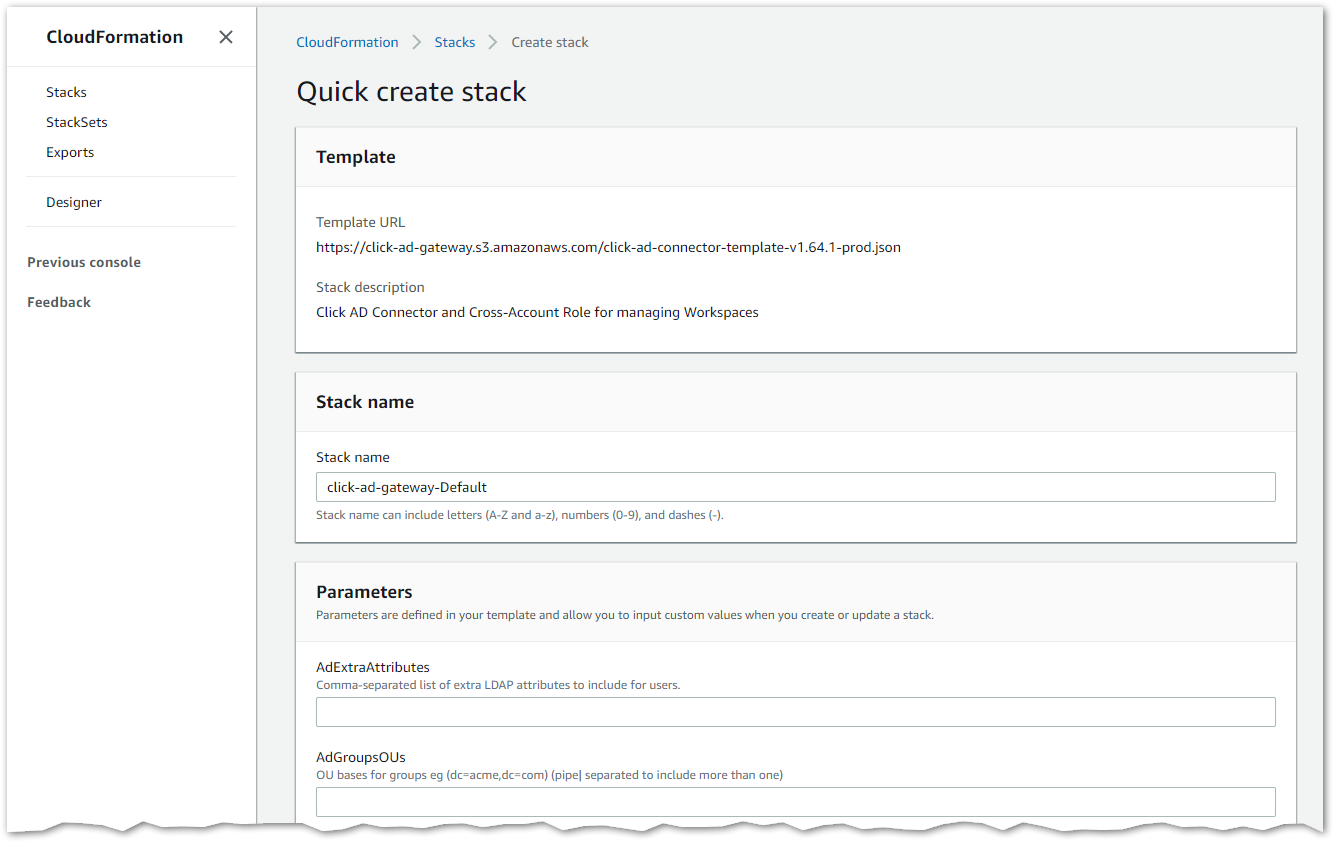
Launch Stackbutton.- A new tab will open showing the CloudFormation Quick create stack screen.

Quick create stack screen
- Populate the CloudFormation stack parameters. For detailed information about each parameter, see the AD Gateway Stack Parameters page.
- Mark the checkbox to accept the creation of IAM resources.

IAM resources dialog
- Create the stack.
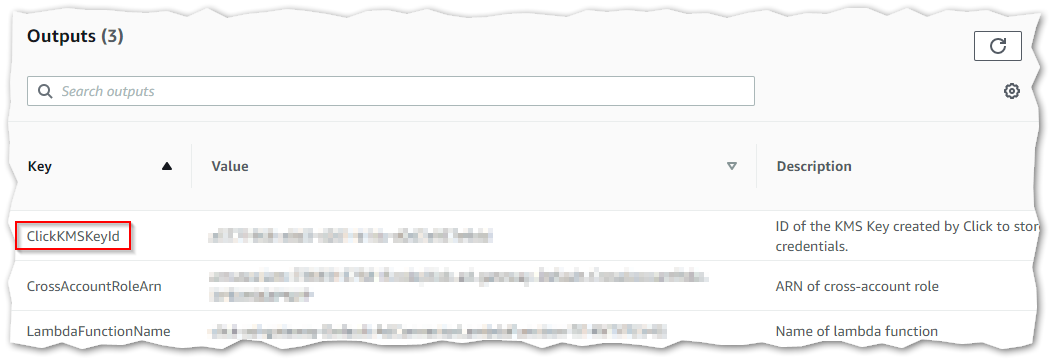
- When the stack is done being created, go to the Output tab and take note of the
ClickKMSKeyIdvalue. You are about to create some parameters in the Systems Manager Parameter Store and you will use this key to encrypt them.

- Go to the AWS Systems Manager service, enter the Parameter Store section, and click
Create Parameter.

AWS Systems Manager Parameter Store screen
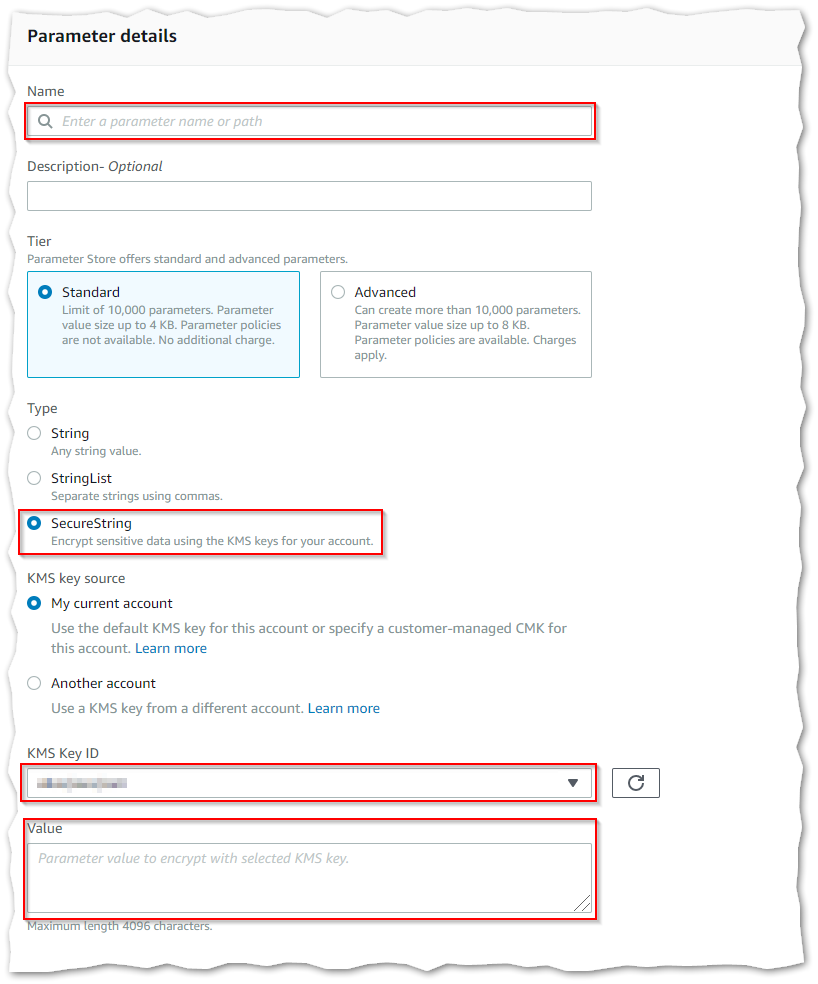
- The Parameter details form will appear.

Parameter details screen
- Fill in the following values and create the parameter.
| Field | Value |
|---|---|
| Name | /prefix/ad/passwordWhere "prefix" is the value you specified for the SSMPrefix parameter in the CloudFormation stack. |
| Type | SecureString |
| KMS Key ID | Select the value displayed in the CloudFormation stack outputs for SSMKeyId. |
| Value | The password for the Active Directory service account you specified in the CloudFormation stack AdUser parameter. |
- Repeat the above process to create a second parameter with these values.
| Field | Value |
|---|---|
| Name | /prefix/shared_secret |
| Type | SecureString |
| KMS Key ID | Select the value displayed in the CloudFormation stack outputs for SSMKeyId |
| Value | Copy this from the AD Gateway screen in the SynchroNet Customer Portal |

Shared secret display on the SynchroNet Customer Portal
- If you are using Secure LDAP, follow the above steps one last time to create a parameter to store the certificate information for establishing an encrypted LDAP connection.
| Field | Value |
|---|---|
| Name | /prefix/ad/cert |
| Type | SecureString |
| KMS Key ID | Select the value displayed in the CloudFormation stack outputs for SSMKeyId |
| Value | Paste the public key value of your certificate, including the -----BEGIN CERTIFICATE----- and -----END CERTIFICATE----- lines |
- Return to the CloudFormation stack outputs screen and copy the values for
CrossAccountRoleArnandLambdaFunctionNameback to the appropriate fields in the SychroNet Customer Portal. - Before clicking
Save and Continue, be sure to select from the dropdown the region into which you deployed your AD Gateway stack.
Review and Launch
At this point, all of your configurations are done. The SynchroNet Customer Portal will display a list of the components you have configured. Once any pending operations on your Instance components complete, you can launch your CLICK Instance.
We hope you find SynchroNet CLICK™ a joy to use!
Updated over 3 years ago
Next, see how to link your WorkSpaces account to CLICK
