Step 6: Linking Your WorkSpaces Account
Getting Started with Multi-Account / Multi-Region
Adding AWS Account in CLICK
1. Add a new AWS Account
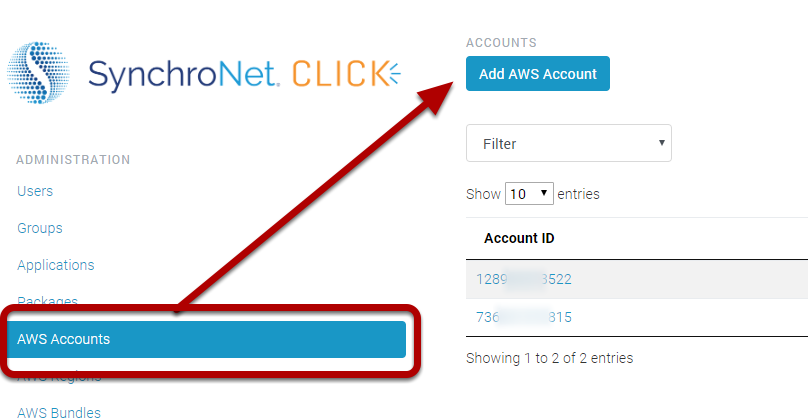
When you add a new account, CLICK provides you the CLICK Role ARNand Trusted External ID. There's a CFN template that is launched from the customer account to create the new role. CLICK Role ARN and Trusted External ID are parameters for that stack, but inside CLICK console, we provide you a link that will auto-populate.
2. Add AWS Account
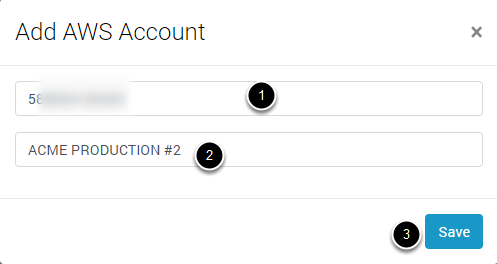
Enter the Account ID , Display Name, and click the Save button
3. Refresh the New Account Page
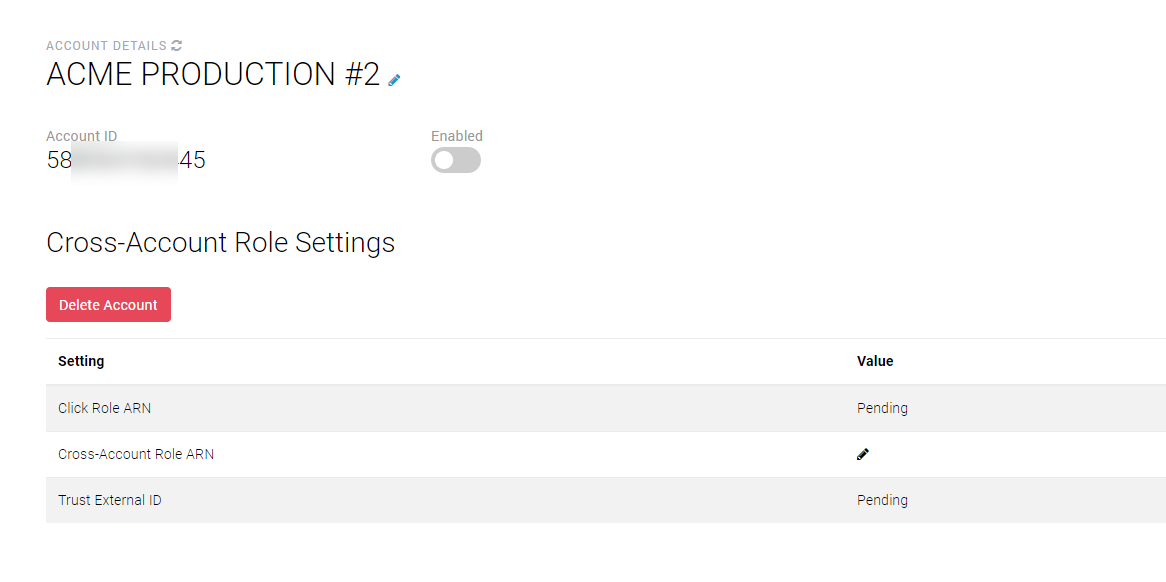
CLICK software will process the new account information. This process may take some time.
Click the refresh button aside the Account Details label to update the settings
details.
4. New Account Role Settings
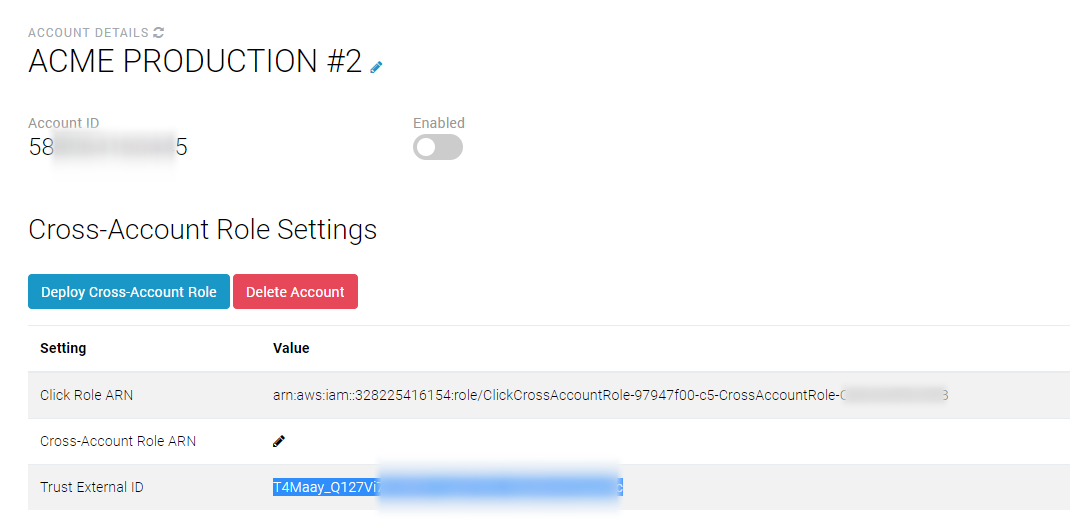
New Account Role Settings
The Cross-Account Role Settings for CLICK-Role ARN and Trust External ID values will contain information.
Prepare to Click the "Deploy Cross-Account Role" button.
When clicking the Deploy Cross-Account button, this will redirect you to
Amazon's AWS Console. The action requires access permissions to launch AWS
Cloudformation in the new account. Follow the next steps below to prior to
clicking the button.
5. Open AWS Console
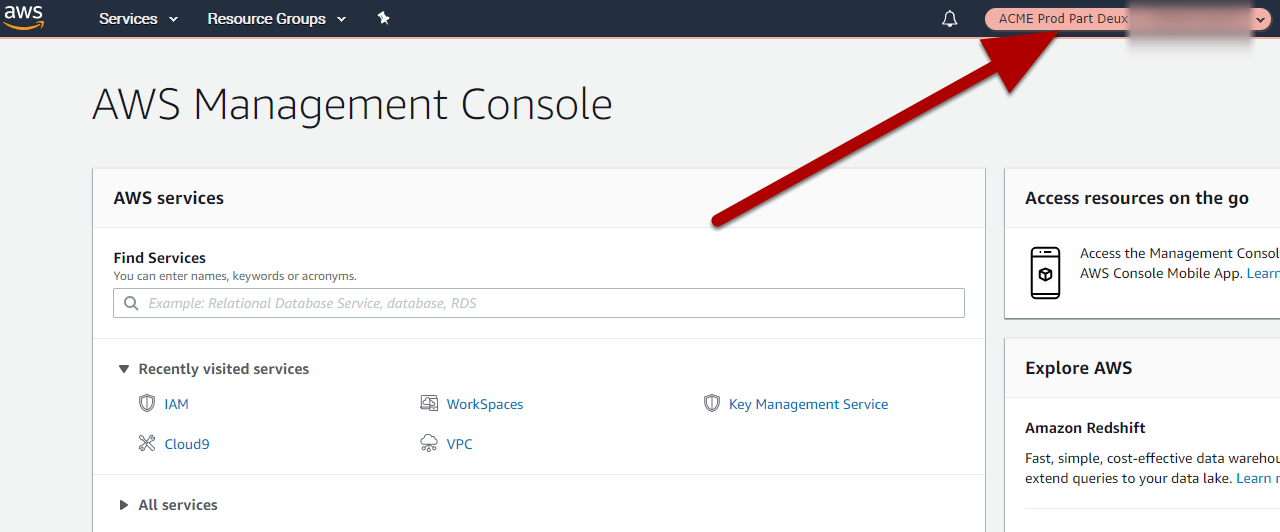
Sign into the account you plan to enable within CLICK.
The user must have permissions to launch AWS Cloudformation stacks.
6. Deploy Cross Account Role
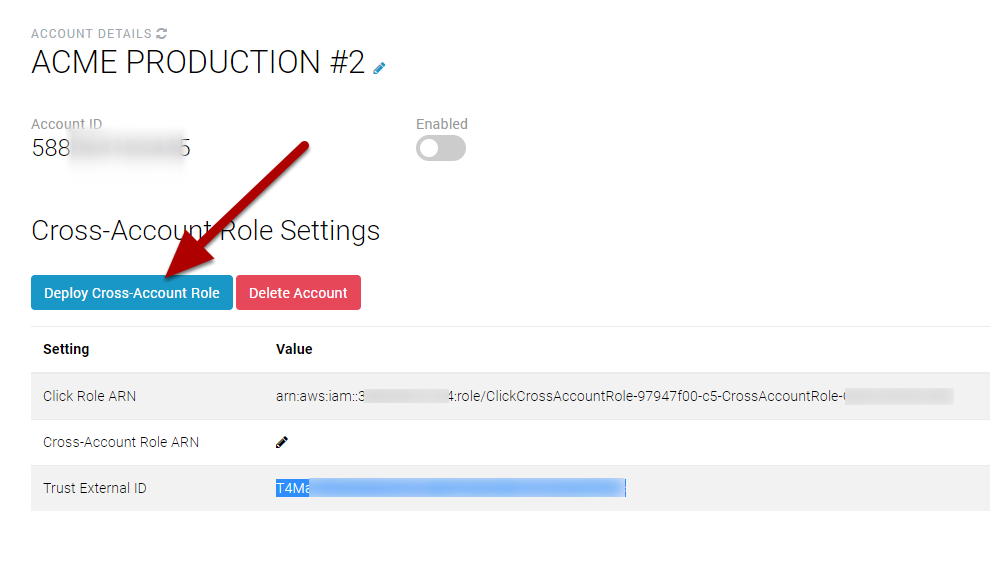
Click the Deploy Cross Account Role
Ensure you are logged into the proper account.
7. AWS Cloudformation
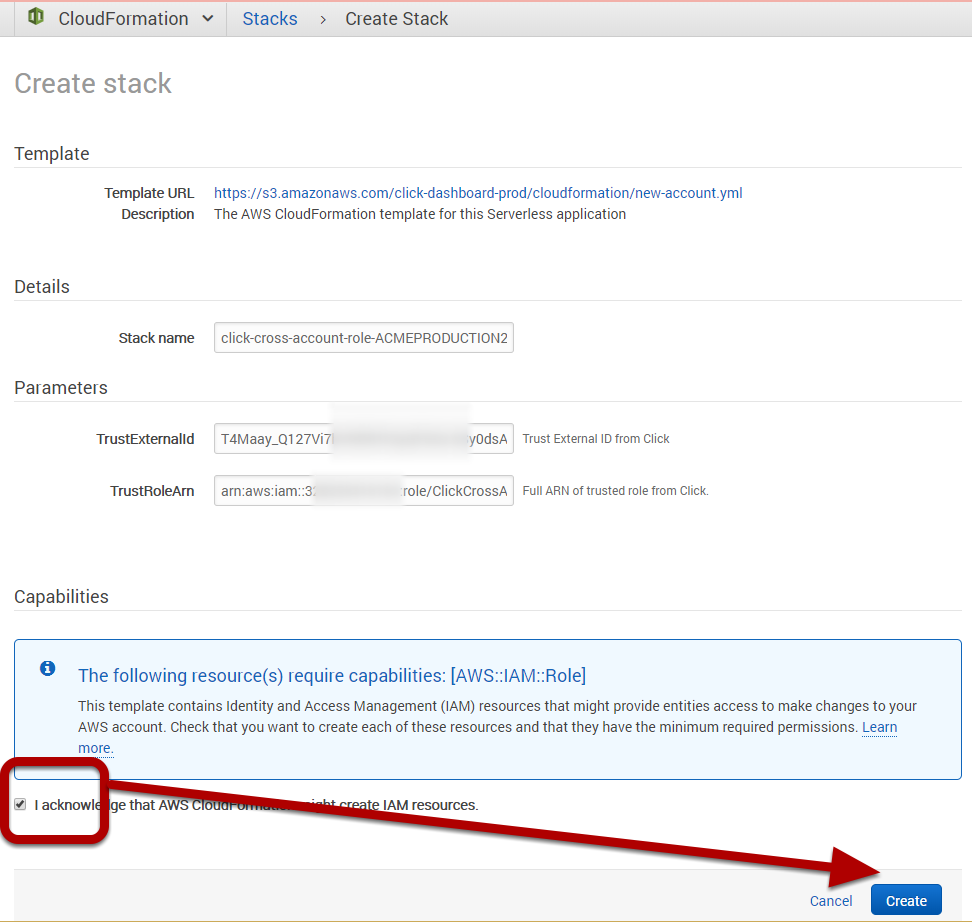
Check the acknowledgment box then click the Create button.
8. Copy Cross Account Role ARN
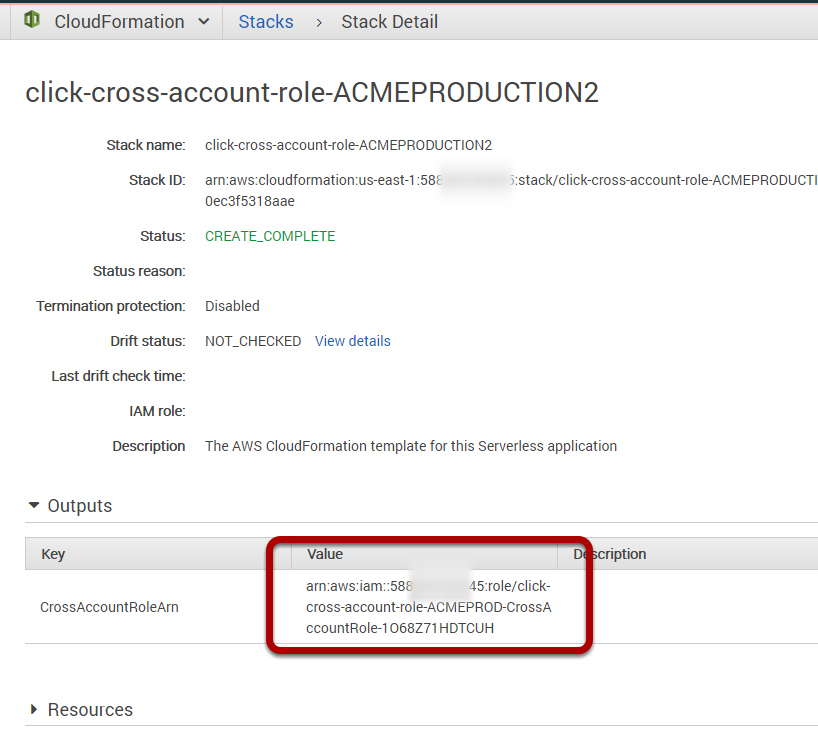
Select and expand the Cloudformation Outputs tab.
Highlight and select the Value of the CrossAccountRoleArn.
9. Paste ARN into edit box
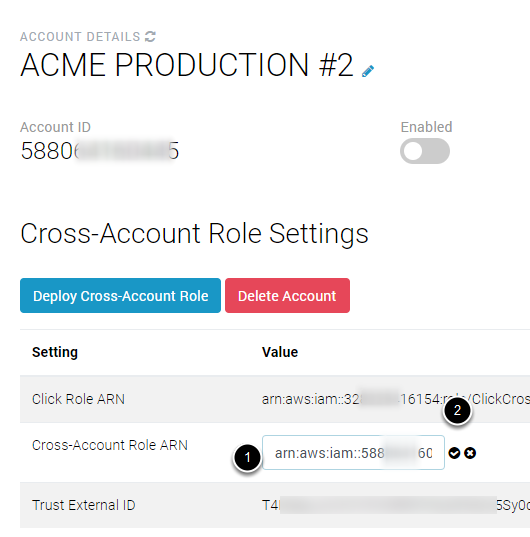
Paste the ARN into the Cross-Account Role ARN Edit Box and click the checkmark to save the ARN.
10. Enable New Account
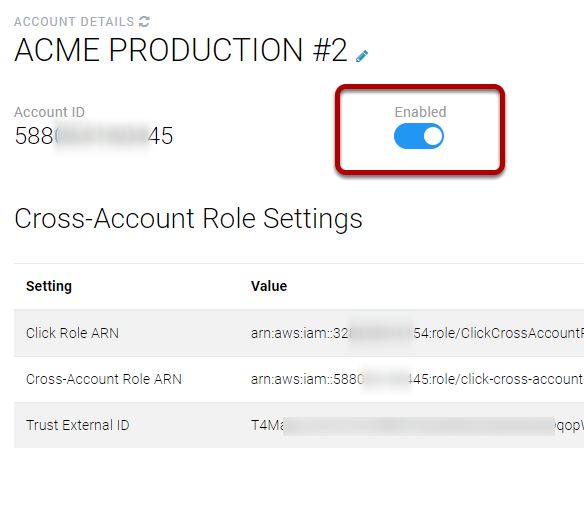
Click the Enabled selector.
11. Enable AWS Regions
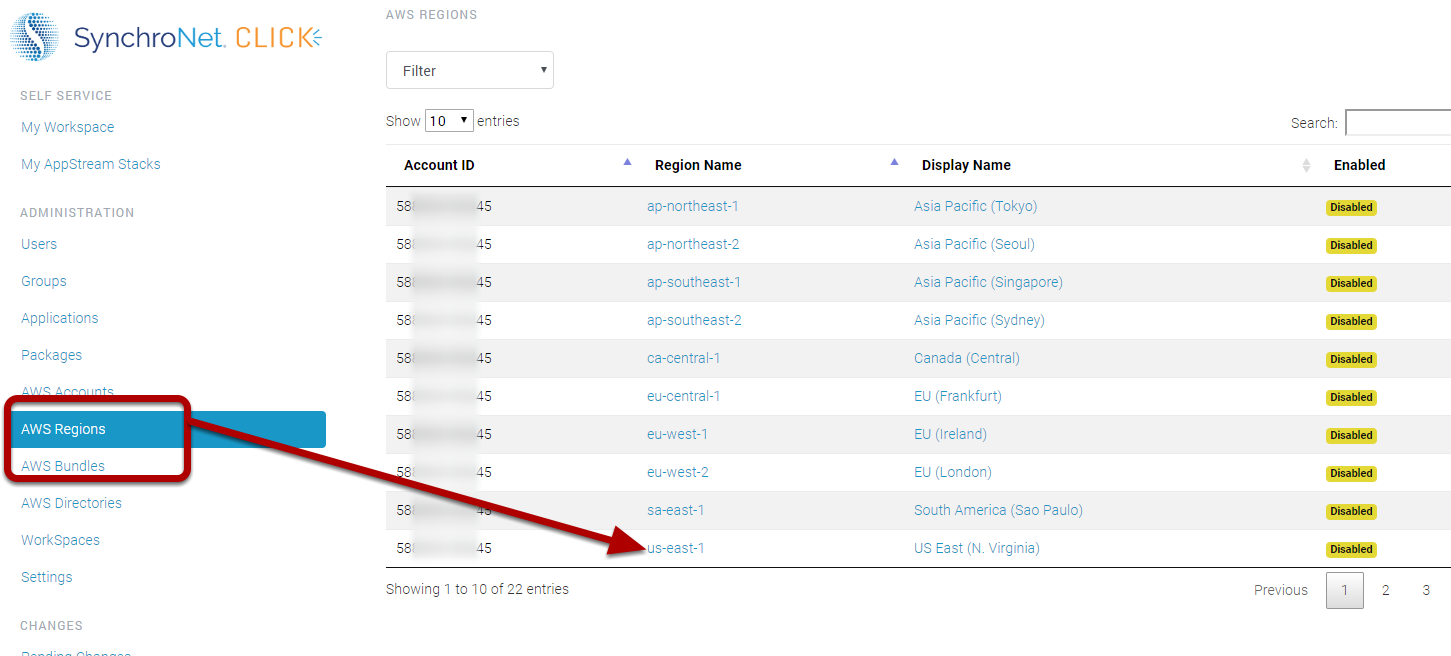
Click the 'Region Name' for the Account. Select the desired Region to enable.
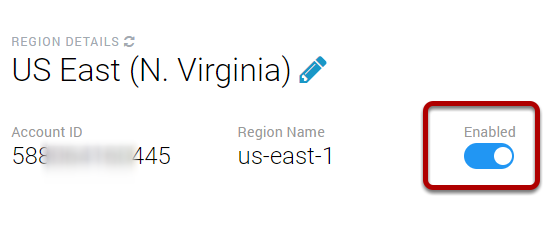
Click the Enabled selector to enable the region.
12. Manage bundles for the new account
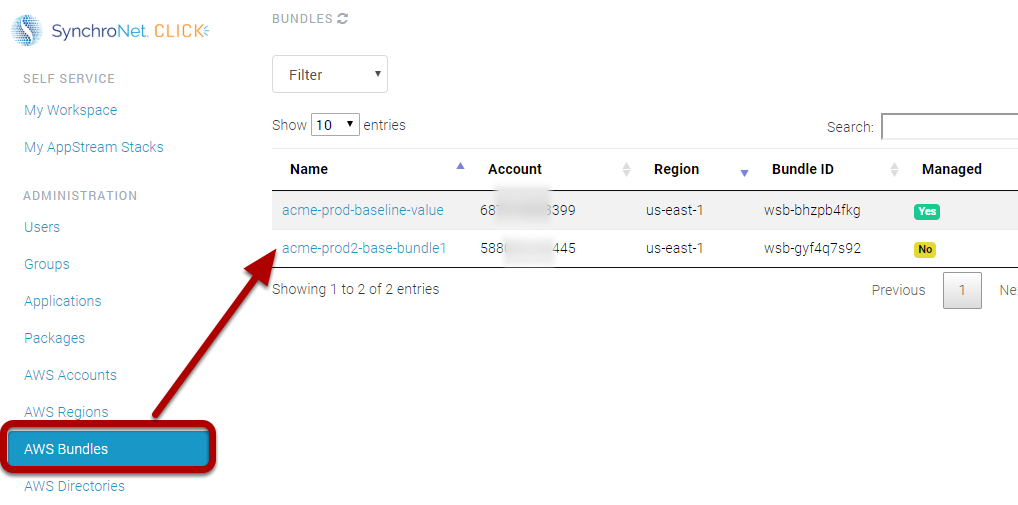
Select AWS Bundles from the CLICK menu. Click the desired bundle to manage.
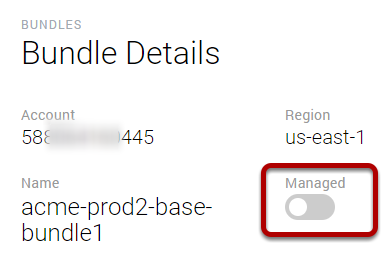
Click the Managed selector button to manage the bundle.
13. Associate Applications with Bundle
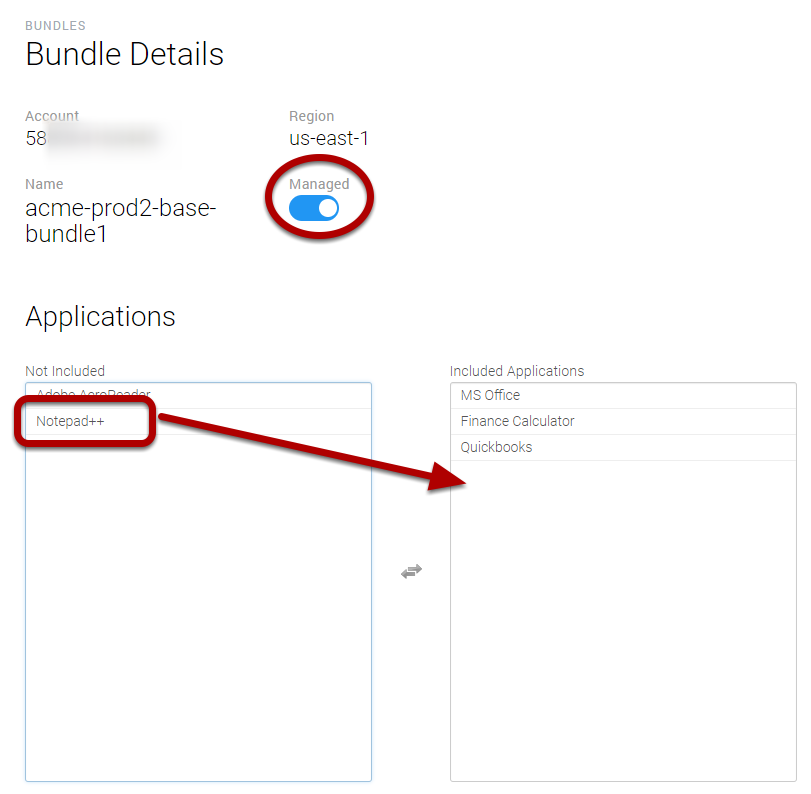
Use the following steps to associate applications with the bundle.
Select the Apps from the "Not Included" box to add to the "Included
Applications" box.
The actions are automatically saved when moved from one field to another.
14. Manage the AWS Directory for the new account
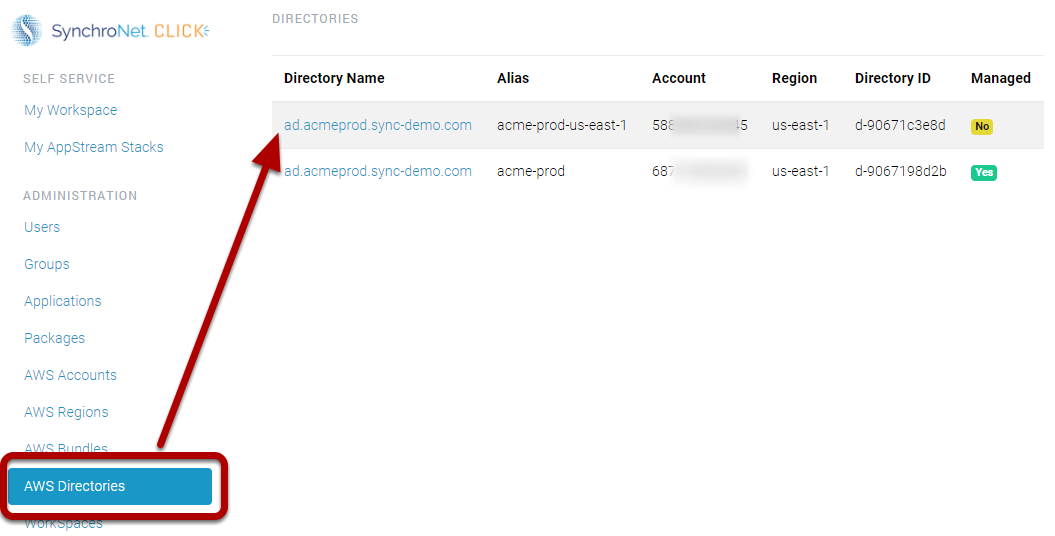
Select AWS Directories from the CLICK Menu.
Click the directory name that requires management.
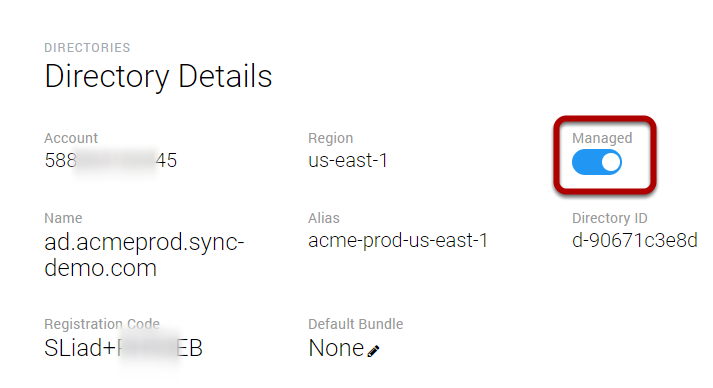
In the directory details page, click the Managed selector button.
The new account is now ready for creating packages.
Updated over 3 years ago
