Upgrade Cross-Account Role
Older instances
If your CLICK Instance was deployed before the introduction of multi-account/multi-region functionality (May 2019), do not follow this guide. Instead, please contact us at [email protected] to schedule an assisted update.
Sometimes CLICK needs new permissions into your AWS account to enable newly added features. This guide will help you upgrade the CloudFormation Stack that grants CLICK access to your AWS account.
Multiple accounts
If you have connected multiple AWS accounts to CLICK (on the AWS Accounts page of the CLICK Dashboard), you will need to perform these steps for each account.
Step 1: Identify the role to update
In the CLICK Dashboard, navigate to the AWS Accounts listing, then pull up the details for your account. Make note of the Cross-Account Role ARN value.
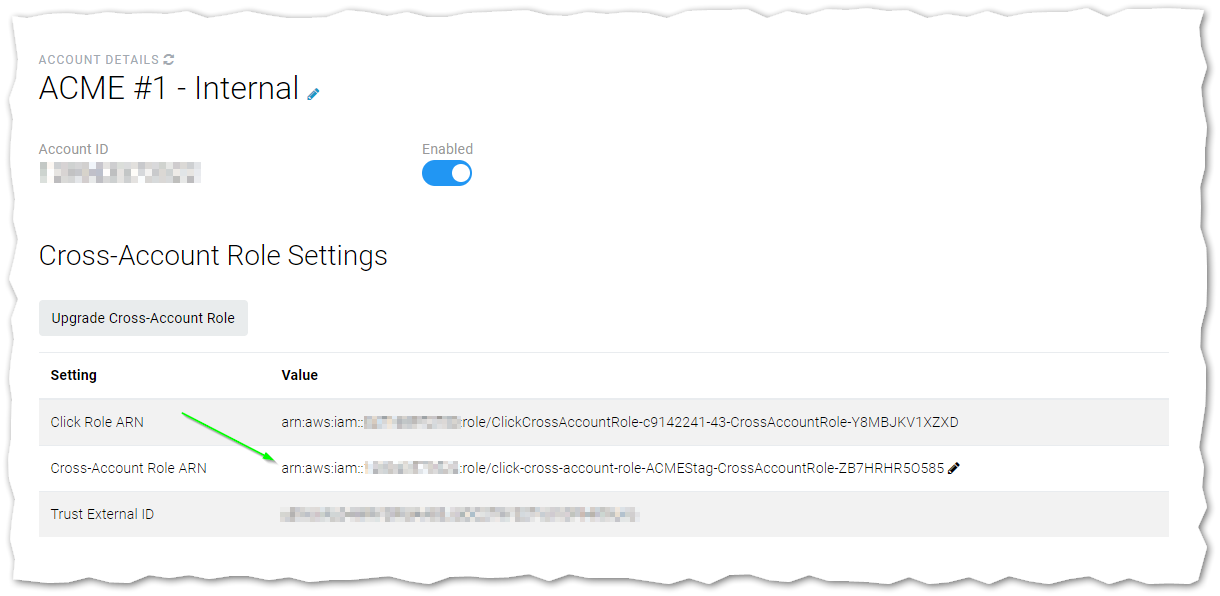
This is the ARN of the role whose permissions must be updated. Since the role was created by a CloudFormation stack, however, we don't want to update the role directly. We need to update the stack itself.
Step 2: Identify the stack to update
Log into the AWS Web Console with a user or role that has sufficient privileges to update CloudFormation stacks and modify IAM roles. Navigate to the CloudFormation service. You'll need to find the CloudFormation stack that created the role we identified above. The default name for CLICK's cross-account role CloudFormation stack is click-cross-account-role-<account name>, so you can start by searching for click-cross-account-role.
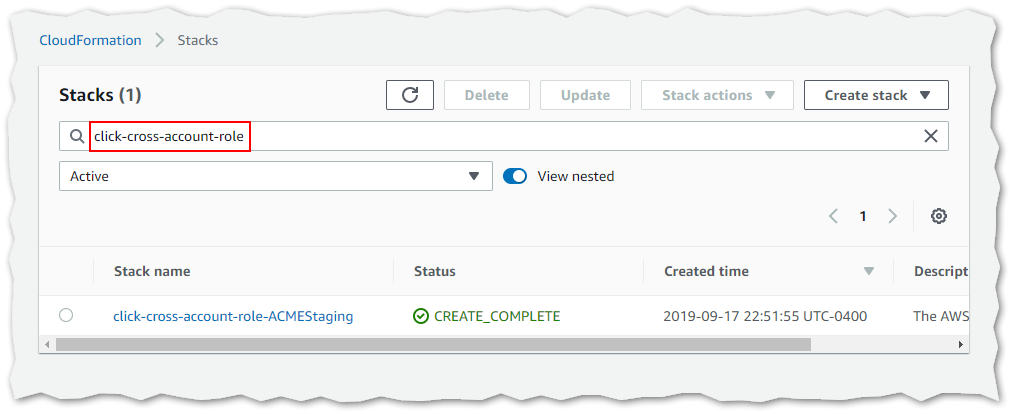
This is only the default value for the stack name. If you modified the name when deploying your cross-account role, you may not get any results from this search.
Once you think you've found the right stack, click on the stack name to view its details. Then, go to the Resources view and look for a resource with a type of AWS::IAM::Role and a Physical ID that matches the ARN of the role we identified in Step 1.

The CLICK cross-account role stack only has one resource. If you see multiple resources in this list, you haven't found the correct stack.
Step 3: Update the stack
From the details view of the stack, click the Update button to begin the process of updating the stack.

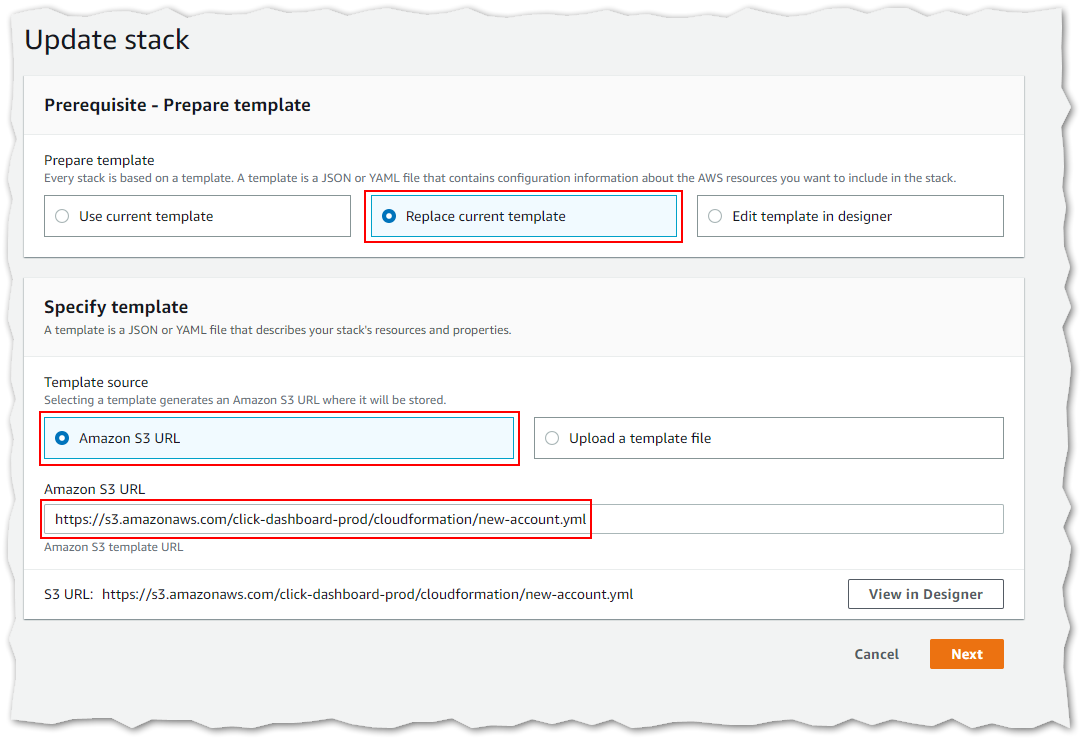
On the next screen, choose the Replace current template option. A new section will appear allowing you to specify the new template. Leave the Amazon S3 URL radio button selected and enter the following in the text field. Click Next to continue.
https://s3.amazonaws.com/click-dashboard-prod/cloudformation/new-account.yml
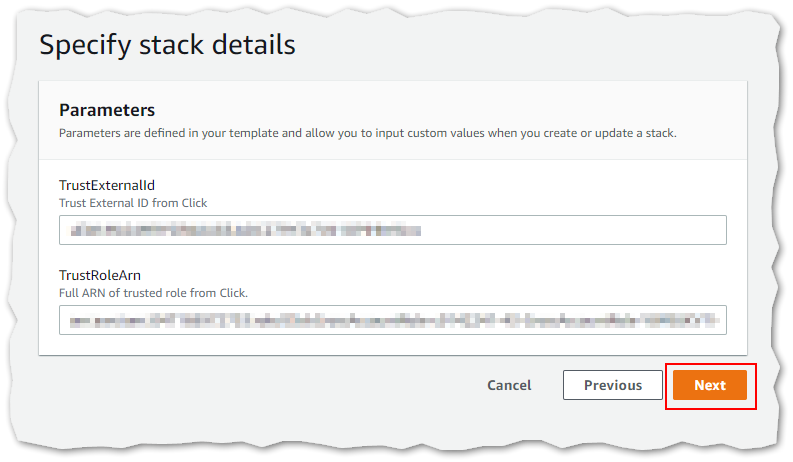
The next screen allows you to change the parameters that were given to the stack. Do not change these, and click Next to continue.
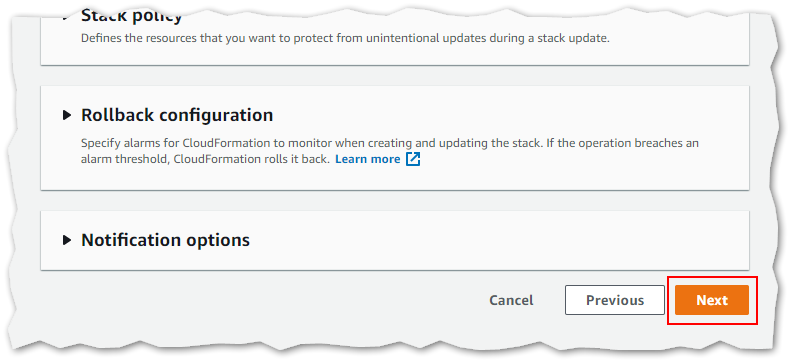
The next screen shows some advanced options. You should not need to change any of these. Click Next to continue.
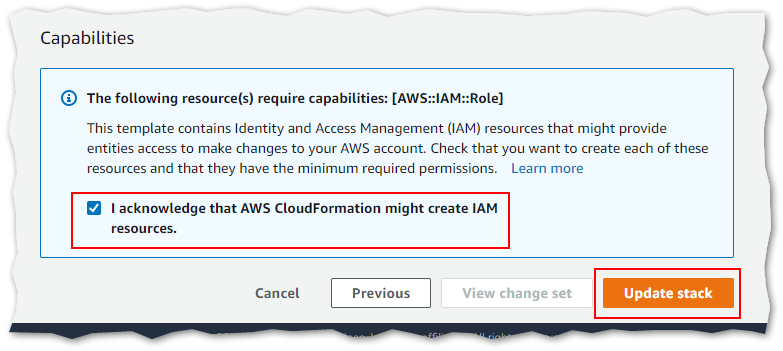
On the final screen, you will need to place a check in a checkbox acknowledging that the stack will create IAM resources. Then, click Update stack to deploy the updated role.
If you see an error stating that the submitted information didn't contain any changes, you have already deployed the latest version of the CLICK cross-account role template. There is no need for you to update your stack.

The stack should take less than 5 minutes to complete its updates.
Congratulations! You have updated your CLICK cross-account role permissions.
Updated about 5 years ago
