AD-Less CLICK Guide
For those organizations where third-party access to their AD is not possible, or perhaps an existing AD environment is incredibly complex and can cause performance and/or connectivity issues with third-party tools, SynchroNet has introduced a new option in its CLICK 4.0 release. AD-less CLICK will allow CLICK to manage your WorkSpaces environment by proxy. In short, we can mirror and manage your AD user base without needing to grant CLICK access to actually query your Active Directory environment.
CLICK AD Gateway
With a typical AD Gateway CLICK deployment, CLICK automatically syncs your AD Users and Groups into its systems for management. This has its benefits: because it’s automatic, new users introduced to the AD environment will be immediately mirrored in the CLICK environment as well. Unfortunately, there are some organizations where this is not possible.
Why AD-less CLICK?
The downside to an AD Gateway CLICK deployment is that setting up the AD Gateway can be a burdensome part of the deployment process, as it requires deploying AWS Lambda resources in the customer account. Additionally, some organizations have a very complex Active Directory making it challenging to set up and to use CLICK's automation.
With an AD-less CLICK deployment, you give up the automatic Active Directory synchronizations for less operational overhead and a more rapid CLICK deployment - which means you are able to manage your WorkSpaces more efficiently and effectively much sooner.
AD-less CLICK provides you the ability to:
-
Create “CLICK-native” Users that reflect the Users in your Active Directory environment
-
Create CLICK-native Groups that reflect (or not) your AD environment
-
Import Users en masse by CSV upload
-
Manage AD-less Group memberships from the CLICK Dashboard
-
Manage all of the AD-less environment with the CLICK API
-
Manage your fleet using the same wonderful workflows of a standard CLICK deployment
AD-less CLICK DeploymentIn order to deploy an AD-less CLICK instance follow the standard workflow, visit our Getting Started section to see the step-by step guide.
The only difference here is you will not be required to create AD Group GUIDS or configure your AD Stack Gateway Parameters.
Once you have subscribed to CLICK in the marketplace and created your SynchroNet Customer Portal account, create your CLICK instance and follow the deployment helper leaving AD fields blank.
When you've completed your deployment you will be able to access your AD-less CLICK instance with a direct link from the SynchroNet Customer Portal.
Once you've successfully deployed AD-less CLICK you can create and manage CLICK-native groups and users.
CLICK-nativeCLICK-native refers to Groups and Users that are created in CLICK without syncing Active Directory (AD-less CLICK).
Create and manage CLICK-native Groups
From the Groups List page, you will find the following Actions dropdown:
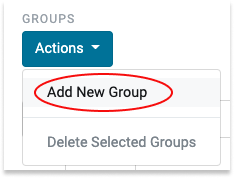
Create a Group by selecting the appropriate option and providing a name.
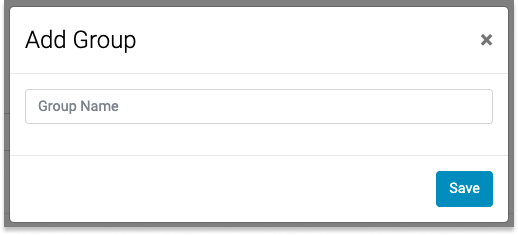
Once you've created CLICK-native groups you can begin to create users and assign them to the appropriate groups.
Create CLICK-native Users
There are two ways you can create CLICK-native users. You can add one user at a time or you can upload a CSV file in order to add multiple users at a time.
Add New User
On the Users page, you will find the following Actions dropdown:
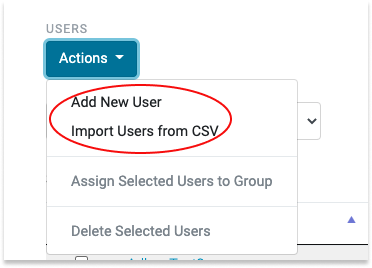
Add a new user by selecting the Add New User option and providing the requested information.
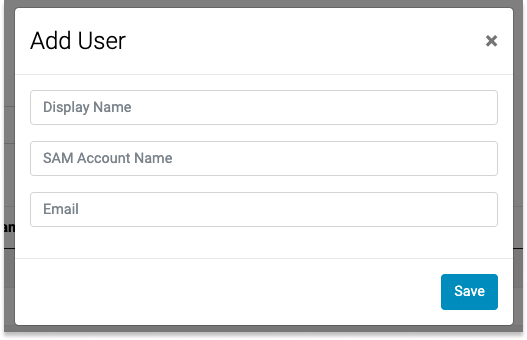
SAM Account NameBe sure that the
SAM_Account_Namedirectly corresponds to a username in your Active Directory environment.
Import a list of users
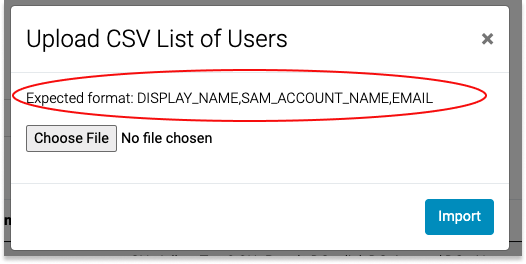
Import a list of users by selecting Import Users from CSV and uploading a CSV file.
CSV Formatting
- The comma-separated columns should be as follows:
display_name, sam_name, email.sam_nameshould correspond directly to a username in your Active Directory environment.- Any username that is found to already exist in the AD-less CLICK environment will be passed over ensuring that you do not create duplicates.
Manage CLICK Users
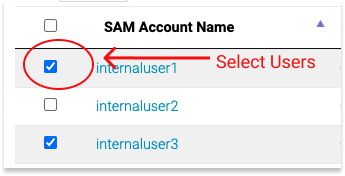
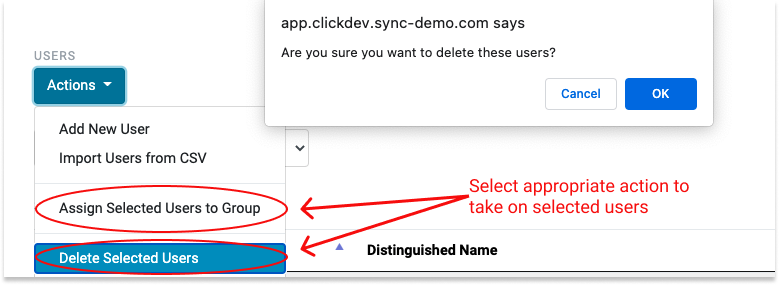
Once you've created users you can Delete Users or Assign Them to a Group on the Users Page by selecting their checkboxes and then choosing the appropriate action:
You can also Assign Users to a Group from the Group Detail Page. Here you can search users by their display names and add multiple users to the group at once.

You will now see the Users you've added on the Group Detail Page.

Once you've organized your CLICK-Native users and groups you can experience CLICK's full functionality. We are excited to be more accessible and hope you'll find CLICK to be a useful way to optimize the time and cost spent managing your WorkSpaces environment.
Updated 8 months ago
See these resources for information on how to configure and operate your CLICK instance.
